

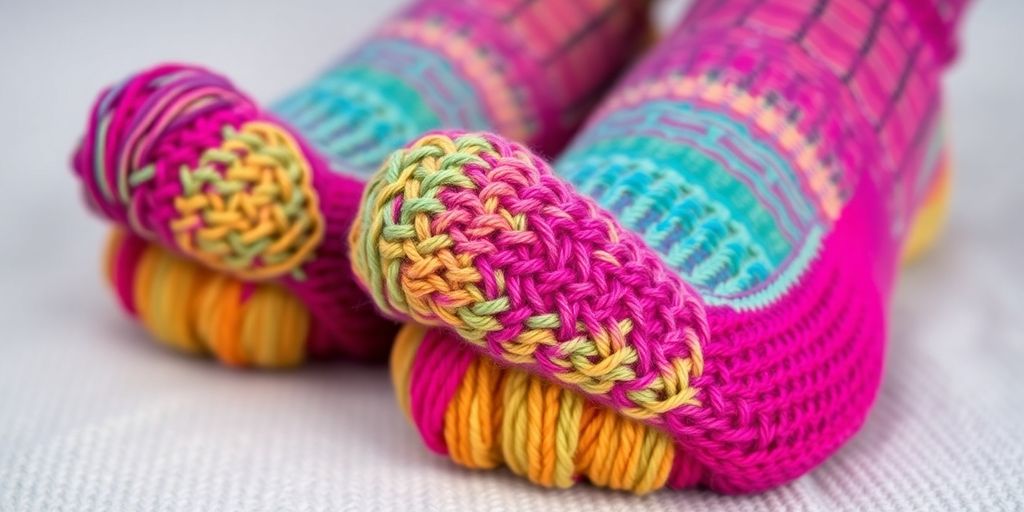
So, you've got some beautiful hand-dyed sock yarn and you're ready to make some awesome socks. That's great! But knitting socks that actually last and look good can be a bit tricky, especially with those unique hand-dyed colors. This guide is here to walk you through everything, from picking your yarn and needles to finishing up your socks so they're comfy and durable. Let's get started and make some socks you'll love to wear!
Key Takeaways
- Picking the right weight of hand-dyed sock yarn and the correct needles is a good first step for a good result.
- Learning how to do the heel and toe correctly makes your hand-dyed socks fit well and last a long time.
- Blocking your finished hand-dyed socks helps them look better and keeps their shape.
- Managing yarn tails and stripes carefully helps your hand-dyed sock designs look clean.
- Even small adjustments to your pattern can make a big difference in how comfortable your hand-dyed socks are.
Essential Materials for Knitting Hand-Dyed Sock Yarn
Before you even think about casting on, gathering the right tools and materials is key. It's like prepping your ingredients before you start cooking – it makes the whole process smoother and more enjoyable. Trust me, nothing is worse than getting halfway through a sock and realizing you're missing something important!
Selecting the Right Hand-Dyed Sock Yarn Weight
Choosing the right yarn is probably the most important step. Most sock patterns call for fingering weight yarn, which is also known as sock yarn or super fine yarn. This weight creates a fabric that's thin enough to comfortably fit inside shoes but still warm enough to keep your feet cozy.
- Fingering weight yarn is the most common choice.
- DK weight yarn can work, but it will produce a thicker sock.
- Always check the yarn label for fiber content – a blend of wool and nylon is ideal for durability. Look for custom hand-dyed sock yarn that speaks to you!
Choosing the Best Needles for Hand-Dyed Sock Yarn
Needles are just as important as the yarn. Double-pointed needles (DPNs) are a classic choice for sock knitting, but circular needles can also be used with the magic loop technique. The size of the needles will depend on the yarn you choose, but a good starting point is 2.25mm (US size 1) or 2.5mm (US size 1.5).
- DPNs are great for smaller circumferences.
- Circular needles offer flexibility with the magic loop method.
- Needle material (bamboo, metal, or wood) is a matter of personal preference.
Additional Tools for Hand-Dyed Sock Knitting
Beyond yarn and needles, there are a few other tools that will make your sock knitting experience much easier. These include:
- A tapestry needle for weaving in ends. This is a must-have for a clean finish.
- Scissors for cutting yarn. Small embroidery scissors work well.
- Stitch markers for marking the beginning of rounds or important points in the pattern.
- A measuring tape to ensure your sock is the correct length. Accurate measurements are key for a good fit.
- Optional: A crochet hook can be helpful for picking up stitches, especially around the heel.
Having all your tools organized and ready to go before you start knitting will save you time and frustration. It also helps to create a more relaxing and enjoyable knitting experience. I like to keep all my sock knitting supplies in a small project bag so I can easily grab them whenever I want to work on a pair of socks.
Mastering the Sock Knitting Process
Traditional Sock Construction Methods
Okay, so you're ready to actually knit these hand-dyed socks. There are a few ways to go about it, but let's stick with the classics for now. The traditional method usually involves working from the cuff down, which is a solid starting point for beginners. It's a time-tested approach that gives you a good feel for sock construction. Think of it as learning the rules before you break them. You can always experiment with toe-up or other fancy techniques later, but mastering the basics is key. This method is great for showing off the color changes in your hand-dyed sock yarn.
Casting On for Hand-Dyed Socks
Casting on is where the magic begins! The type of cast-on you choose can affect the stretchiness of your cuff. A long-tail cast-on is pretty standard, but a stretchy cast-on like the German twisted cast-on might be better, especially if you tend to knit tightly. Here's a few things to keep in mind:
- Stitch Count: Make sure you have the right number of stitches for your sock size. Too few, and your sock will be too tight; too many, and it'll be baggy.
- Even Tension: Keep your tension consistent while casting on. Uneven tension can lead to a wonky-looking cuff.
- Needle Size: Use the recommended needle size for your yarn weight. If you're using a stretchy cast-on, you might even go up a needle size to ensure it's extra stretchy.
Casting on might seem simple, but it's the foundation of your entire sock. Take your time, pay attention to your tension, and make sure you have the correct number of stitches. A good cast-on sets you up for success.
Knitting the Leg of Your Hand-Dyed Socks
Now for the leg! This is where you can really let your hand-dyed yarn shine. Most sock patterns start with ribbing (like K2, P2) for the cuff, which provides elasticity. After the cuff, you'll typically switch to stockinette stitch (knit every round) for the leg. Here's what to consider:
- Stripe Management: If your yarn is striped or variegated, think about how the colors will pool or stripe as you knit. You might want to alternate skeins every few rows to prevent pooling.
- Leg Length: Decide how long you want your sock leg to be. Measure from your ankle to where you want the sock to end. Remember that socks tend to stretch a bit with wear, so don't make them too long.
- Consistent Tension: Keep your tension consistent throughout the leg. This will ensure that your sock is evenly sized and shaped. If you're new to sock knitting, consider using [double pointed needles](https://www.jimmybeanswool.com/knitting.asp?advsrc=GGLAW&gclid=Cj0KCQjwz9i3BhCgARIsAPrwt9F-j6-99999999999999999999999999999999999999999999999999999999999999999999999999999999999999999999999999999999999999999999999999999999999999999999999999999999999999999999999999999999999999999999999999999999999999999999999999999999999999999999999999999999999999999999999999999999999999999999999999999999999999999999999999999999999999999999999999999999999999999999999999999999999999999999999999999999999999999999999999999999999999999999999999999999999999999999999999999999999999999999999999999999999999999999999999999999999999999999999999999999999999999999999999999999999999999999999999999999999999999999999999999999999999999999999999999999999999999999999999999999999999999999999999999999999999999999999999999999999999999999999999999999999999999999999999999999999999999999999999999999999999999999999999999999999999999999999999999999999999999999999999999999999999999999999999999999999999999999999999999999999999999999999999999999999999999999999999999999999999999999999999999999999999999999999999999999999999999999999999999999999999999999999999999999999999999999999999999999999999999999999999999999999999999999999999999999999999999999999999999999999999999999999999999999999999999999999999999999999999999999999999999999999999999999999999999999999999999999999999999999999999999999999999999999999999999999999999999999999999999999999999999999999999999999999999999999999999999999999999999999999999999999999999999999999999999999999999999999999999999999999999999999999999999999999999999999999999999999999999999999999999999999999999999999999999999999999999999999999999999999999999999999999999999999999999999999999999999999999999999999999999999999999999999999999999999999999999999999999999999999999999999999999999999999999999999999999999999999999999999999999999999999999999999999999999999999999999999999999999999999999999999999999999999999999999999999999999999999999999999999999999999999999999999999999999999999999999999999999999999999999999999999999999999999999999999999999999999999999999999999999999999999999999999999999999999999999999999999999999999999999999999999999999999999999999999999999999999999999999999999999999999999999999999999999999999999999999999999999999999999999999999999999999999999999999999999999999999999999999999999999999999999999999999999999999999999999999999999999999999999999999999999999999999999999999999999999999999999999999999999999999999999999999999999999999999999999999999999999999999999999999999999999999999999999999999999999999999999999999999999999999999999999999999999999999999999999999999999999999999999999999999999999999999999999999999999999999999999999999999999999999999999999999999999999999999999999999999999999999999999999999999999999999999999999999999999999999999999999999999999999999999999999999999999999999999999999999999999999999999999999999999999999999999999999999999999999999999999999999999999999999999999999999999999999999999999999999999999999999999999999999999999999999999999999999999999999999999999999999999999999999999999999999999999999999999999999999999999999999999999999999999999999999999999999999999999999999999999999999999999999999999999999999999999999999999999999999999999999999999999999999999999999999999999999999999999999999999999999999999999999999999999999999999999999999999999999999999999999999999999999999999999999999999999999999999999999999999999999999999999999999999999999999999999999999999999999999999999999999999999999999999999999999999999999999999999999999999999999999999999999999999999999999999999999999999999999999999999999999999999999999999999999999999999999999999999999999999999999999999999999999999999999999999999999999999999999999999999999999999999999999999999999999999999999999999999999999999999999999999999999999999999999999999999999999999999999999999999999999999999999999999999999999999999999999999999999999999999999999999999999999999999999999999999999999999999999999999999999999999999999999999999999999999999999999999999999999999999999999999999999999999999999999999999999999999999999999999999999999999999999999999999999999999999999999999999999999999999999999999999999999999999999
Adding Visual Interest with Hand-Dyed Yarn Stripes
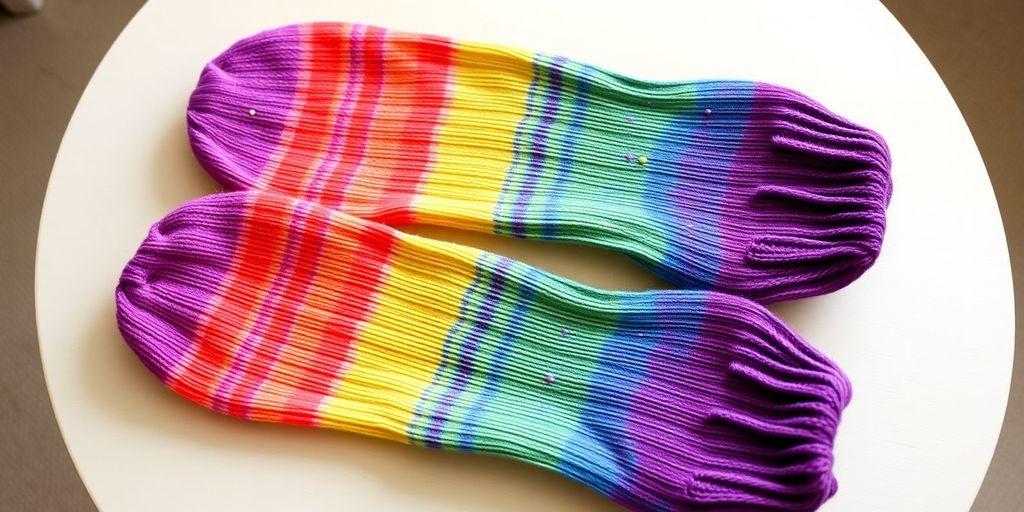
Hand-dyed yarn is already beautiful, but adding stripes can take your socks to the next level! It's a fun way to play with color and create unique designs. Let's explore how to make those stripes look amazing.
Calculating Stripe Placement for Hand-Dyed Socks
Planning is key! Before you even cast on, think about how you want your stripes to look. Do you want even stripes? Random widths? Consider the repeat of your hand-dyed yarn and how it will play out in your stripe pattern.
Here's a simple way to calculate stripe placement:
- Measure Your Gauge: Knit a swatch with your chosen yarn and needles to determine your stitch and row gauge.
- Decide on Stripe Widths: Determine how many rows each stripe will be.
- Calculate Stripe Height: Use your row gauge to calculate the height of each stripe in inches or centimeters.
- Plan Your Sequence: Write down the order of your stripes to keep track as you knit.
Techniques for Seamless Hand-Dyed Yarn Stripes
Jogless stripes are the goal! No one wants a visible jog where the stripes meet. Here are a few techniques to try:
- The Lifted Increase Method: On the first stitch of the new round, lift the stitch below the first stitch of the previous round onto your left needle and knit it together with the first stitch. This closes the gap.
- The Slip Stitch Method: Slip the first stitch of each stripe. This can help to even out the transition.
- The Spiral Stripe Method: Instead of joining in the round, knit in a spiral. This eliminates the jog altogether, but it's important to note that this method is only suitable for socks knit from the toe-up. If you are using self-striping sock yarn, this method will not work.
When working with hand-dyed yarn, remember that each skein is unique. Even within the same dye lot, there can be variations in color. Embrace these variations! They add character to your socks. If you're concerned about drastic color changes, consider alternating skeins every few rows to blend the colors more gradually.
Managing Yarn Tails in Striped Hand-Dyed Socks
Ugh, yarn tails. They're the bane of every knitter's existence, especially when working with multiple colors. Here's how to keep them under control:
- Weave in as you go: This is the best method! Use a tapestry needle to weave in the ends a few stitches at a time as you knit. This saves you a ton of time later.
- Leave long tails: If you prefer to weave in later, leave generous tails (at least 6 inches) to make weaving easier.
- Use a crochet hook: A small crochet hook can help you pull the yarn tails through the back of your work.
| Stripe Width (Rows) | Tail Management Recommendation 1. The Lifted Increase Method: On the first stitch of the new round, lift the stitch below the first stitch of the previous round onto your left needle and knit it together with the first stitch. This closes the gap. 2. The Slip Stitch Method: Slip the first stitch of each stripe. This can help to even out the transition. 3. The Spiral Stripe Method: Instead of joining in the round, knit in a spiral. This eliminates the jog altogether, but it's important to note that this method is only suitable for socks knit from the toe-up. If you are using self-striping sock yarn, this method will not work. > When working with hand-dyed yarn, remember that each skein is unique. Even within the same dye lot, there can be variations in color. Embrace these variations! They add character to your socks. If you're concerned about drastic color changes, consider alternating skeins every few rows to blend the colors more gradually. ### Managing Yarn Tails in Striped Hand-Dyed Socks Ugh, yarn tails. They're the bane of every knitter's existence, especially when working with multiple colors. Here's how to keep them under control: * Weave in as you go: This is the best method! Use a tapestry needle to weave in the ends a few stitches at a time as you knit. This saves you a ton of time later. * Leave long tails: If you prefer to weave in later, leave generous tails (at least 6 inches) to make weaving easier. * Use a crochet hook: A small crochet hook can help you pull the yarn tails through the back of your work. | Stripe Width (Rows) | Tail Management Recommendation | | --- | --- | | 4 or fewer | Carry the yarn on the backside. | | 5-10 | Carry the yarn on the backside, creating floats every 2-3 rows. | | More than 10 | Cut the yarn after each stripe and weave in the ends. |
Crafting a Durable Hand-Dyed Sock Heel
Knitting a sturdy heel is key to making your hand-dyed socks last. After all, the heel takes a beating! Let's explore some techniques to reinforce this crucial area.
Knitting a Reinforced Heel Flap
A reinforced heel flap is your first line of defense against wear and tear. There are a few ways to achieve this, but slipping stitches is a popular choice. This creates a denser fabric that can withstand more friction. I like to slip every other stitch, which adds extra cushion. You can also hold a thin nylon thread together with your sock yarn while knitting the heel for even more durability. This is especially useful if you know you'll be hard on your socks. Remember to choose the right hand-dyed sock yarn weight for your project.
Forming the Heel Turn for Hand-Dyed Socks
The heel turn is where the magic happens, shaping the heel cup. It's all about short rows! This technique involves working only a portion of the heel flap stitches at a time, gradually decreasing to create the curve. Pay close attention to your pattern instructions here, as different patterns use different methods. Some use wrap and turn, while others use German short rows. I find that German short rows create a cleaner, less bulky turn. The key is to maintain even tension throughout the process. This will prevent holes and ensure a comfortable fit. Here's a tip: use stitch markers to keep track of your turning points.
Picking Up Gusset Stitches for a Perfect Fit
Once the heel turn is complete, it's time to pick up gusset stitches. This is where you bridge the gap between the heel flap and the leg of the sock. Picking up the correct number of stitches is crucial for a good fit. Too few stitches, and the sock will be tight around the ankle. Too many, and you'll end up with excess fabric. I like to pick up one extra stitch at each corner of the heel flap to prevent holes. Then, decrease these extra stitches gradually over a few rounds. This creates a smooth transition and a comfortable gusset. Don't be afraid to experiment with different traditional sock construction methods to find what works best for you.
Blocking your socks after knitting the heel can help even out the stitches and improve the overall shape. It's a simple step that makes a big difference in the final product.
Shaping the Foot and Toe of Your Hand-Dyed Socks
Knitting the Foot Section with Hand-Dyed Yarn
Once you've navigated the heel and gusset, it's time to focus on the foot. The foot section is usually knitted in plain stockinette stitch, letting the beauty of your hand-dyed sock blanks shine. If you incorporated stripes, just continue your established pattern. There's no need for decreases in this section unless you find the fabric too loose across your instep; in that case, consider decreasing for a round or two.
Determining the Ideal Foot Length for Hand-Dyed Socks
Getting the foot length right is key for a comfortable sock. The best way to determine the length is by referencing shoe size. However, you need to account for the length already taken up by the heel/gusset and the future toe. A good rule of thumb is to start decreasing for the toe when your knitting reaches the middle of your pinky toe. If you have longer toes, adjust accordingly and start closer to the tip.
Decreasing for a Well-Fitted Toe
The toe shaping is where you'll decrease stitches to close the sock. There are several methods, but a common one involves decreasing at four points: at the beginning and end of both the top and bottom needles. This creates a rounded toe. Make sure you have an equal number of stitches on the top and bottom needles before you begin. Each round will get shorter and shorter as you decrease. If you want a pointier toe, you can try different decrease rates, but be aware that this might not provide the best fit.
Remember to try on your sock as you go! If the toe box feels too big or too small, unravel and adjust the start of your toe decreases accordingly. It's much easier to fix it now than after you've finished the entire sock.
Here's a simple example of a toe decrease pattern:
| Round | Action |
|---|---|
| 1 | Knit to 3 stitches before the end of the first needle, k2tog, k1, k1, ssk, knit to the end of the second needle. |
| 2 | Knit all stitches. |
| 3 | Repeat round 1. |
| 4 | Repeat round 2. |
Continue this pattern until you have a small number of stitches remaining, then use the Kitchener stitch to close the toe seamlessly. This will give you a professional-looking finish and a comfortable sock to wear. Don't forget to weave in those ends!
Finishing Techniques for Hand-Dyed Socks
Executing the Kitchener Stitch for a Seamless Toe
Okay, you've made it to the very end! The Kitchener stitch is like the secret handshake of the knitting world. It's what gives you that smooth, invisible join at the toe of your sock. No more bulky seams rubbing against your toes! It might seem intimidating at first, but trust me, with a little practice, you'll be a Kitchener pro. There are tons of great tutorials online, many with videos, that walk you through it step-by-step. The key is to take it slow and pay attention to which stitch you're working.
- Set up your needles with an equal number of stitches on each.
- Thread your yarn onto a tapestry needle.
- Follow the Kitchener stitch sequence carefully.
Don't be afraid to frog it (rip it out) if you mess up! It's better to redo a few stitches than to live with a wonky toe seam forever. Plus, every time you practice, you get a little bit better.
Weaving in Ends on Hand-Dyed Sock Yarn
Ugh, weaving in ends. It's nobody's favorite part, but it's a necessary evil. If you don't weave in your ends securely, they'll eventually start to unravel, and all your hard work will be for nothing. With hand-dyed yarn, it's especially important to be careful because those color changes can make the ends more noticeable. I like to use a tapestry needle and weave the ends along the same color for a bit, then switch to weaving along a different color to really lock them in. You can find a tapestry needle at most craft stores.
- Use a sharp tapestry needle.
- Weave in ends along the same color for a short distance.
- Change direction and weave along a different color.
Trying On and Adjusting Your First Hand-Dyed Sock
Alright, the moment of truth! It's time to try on your sock. But don't just slip it on and call it a day. Really pay attention to how it fits. Is it too tight? Too loose? Is the heel in the right place? Does the toe feel comfortable? This is your chance to make any adjustments before you knit the second sock. If something feels off, don't be afraid to unravel a bit and make changes. Maybe you need to add a few rows to the foot, or decrease the toe a little differently. The goal is to create a pair of socks that you'll actually want to wear.
| Fit Area | Potential Issue | Adjustment |
|---|---|---|
| Foot Length | Too Short | Add rows before toe decreases |
| Foot Length | Too Long | Remove rows before toe decreases |
| Heel Placement | Off | Adjust heel flap length or gusset increases |
The Importance of Blocking Hand-Dyed Socks
Understanding the Benefits of Blocking
Blocking is a step some knitters skip, but it can really make a difference, especially with hand-dyed yarns. Blocking helps to even out your stitches and relax the yarn, showcasing the colors and patterns of your hand-dyed yarn to their full potential. It's like giving your socks a spa day after all that hard work!
- It evens out stitch tension, making your socks look more uniform.
- It helps the yarn bloom, softening the fibers and enhancing the colors.
- It sets the shape of your socks, ensuring a better fit.
Blocking can also help to correct minor imperfections in your knitting. If you have some uneven stitches or a slightly wonky shape, blocking can often smooth things out. It's not a miracle cure, but it can definitely improve the overall appearance of your finished socks.
Steps for Wet Blocking Hand-Dyed Socks
Wet blocking is the most common method, and it's pretty straightforward. Here's how I usually do it:
- Fill a basin with lukewarm water and add a gentle wool wash. I like to use something that won't strip the yarn's color.
- Submerge your socks in the water and gently squeeze to saturate them. Let them soak for about 15-20 minutes.
- Carefully remove the socks from the water and gently squeeze out the excess water. Avoid twisting or wringing, as this can distort the shape.
- Lay the socks flat on a clean towel and roll them up to remove more water. You can also press gently.
- Lay the socks flat on a blocking board or a clean, dry towel. Shape them to the desired dimensions and pin them in place, paying attention to the heel and toe.
Drying and Caring for Your Finished Hand-Dyed Socks
Once your socks are blocked, it's important to dry them properly to maintain their shape and prevent damage. Here's what I recommend:
- Allow the socks to air dry completely, away from direct sunlight or heat. This can take anywhere from 12 to 24 hours, depending on the yarn and humidity.
- Once the socks are dry, remove the pins and admire your beautifully blocked hand-dyed socks!
- To care for your hand-dyed socks, hand wash them in cool water with a gentle wool wash and lay them flat to dry. Avoid using harsh detergents or putting them in the dryer, as this can damage the fibers and fade the colors. You can also use sock blanks to make your own hand-dyed yarn.
Wrapping Things Up
So, there you have it! We've gone through a lot, from picking the right yarn to finishing up those toes. It might seem like a lot at first, but trust me, once you get the hang of it, knitting socks is super rewarding. Don't worry if your first pair isn't perfect; mine certainly weren't! Every stitch is a step toward getting better. Just keep practicing, and soon you'll be whipping up handmade socks for everyone you know. Happy knitting!
Frequently Asked Questions
What makes hand-dyed sock yarn different?
Hand-dyed yarn is special because each skein is colored by hand, making every one a little different. This means your socks will have unique colors and patterns that you won't find in machine-dyed yarn.
How do I choose the best hand-dyed yarn for socks?
You'll want to pick a yarn that's strong and can handle a lot of wear, since socks get used a lot. Look for yarns with a bit of nylon or other strong fibers mixed in with the wool. This helps them last longer and keep their shape.
Is blocking my hand-dyed socks really necessary?
Blocking is like giving your finished socks a gentle bath and then shaping them. It helps even out your stitches, makes the colors pop, and gives your socks a nicer, more finished look. It also helps them fit better.
What's the best way to care for my hand-dyed socks?
To keep your hand-dyed socks looking great, wash them gently by hand in cool water with a mild soap. Don't wring them out. Instead, gently squeeze out the extra water and lay them flat to dry. This stops the colors from fading and keeps the yarn from getting fuzzy.
Can I use hand-dyed sock yarn for things other than socks?
Yes, you can definitely use hand-dyed yarn for other projects! It's great for scarves, hats, shawls, or even small sweaters. Just remember that the unique colors might look different depending on the stitch you use.
What knitting stitches look best with hand-dyed yarn?
If your hand-dyed yarn has lots of different colors, a simple stitch like stockinette will let the colors shine. If you want to add texture, try a ribbed pattern or a simple cable, but make sure it doesn't hide the beautiful color changes too much.