

So, you've got some gorgeous hand-dyed yarn, right? It's super pretty, but sometimes, when you start knitting, things can get a little wild. You might end up with weird color patches or lines where one skein ends and another begins. It's a bummer, especially after all that work! But don't worry, there's a simple trick many knitters use to keep things looking smooth and even: you alternate skeins. This post will walk you through why this little step can make a big difference for your projects and how to do it without a headache.
Key Takeaways
- Hand-dyed yarns are unique; no two skeins are exactly alike, even from the same dye lot, which can cause color differences.
- Alternating skeins helps avoid obvious lines where you switch yarns and prevents unwanted color pooling or blocking.
- For bigger projects or very colorful yarns, alternating skeins throughout is usually a good idea to keep things consistent.
- There are different ways to alternate skeins, like the carry-up method, and you can pick what works best for your project.
- Prepping your yarn, like winding multiple skeins beforehand, makes the alternating process much smoother.
Understanding Hand-Dyed Yarn Characteristics
Hand-dyed yarn is just so beautiful, right? But it's also a little different than your regular, commercially dyed stuff. Understanding these differences is key to getting the best results in your projects, especially when you're working on something big. Let's get into it.
The Unique Nature of Hand-Dyed Yarn
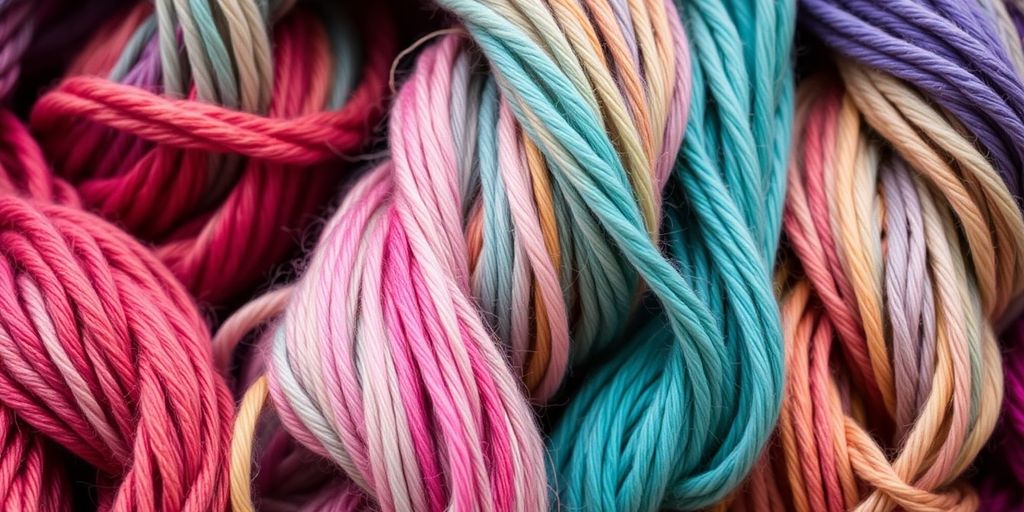
Each skein of hand-dyed yarn is unique. Seriously, even if they're from the same dye lot, there will be slight variations. This is because the dyeing process is done by hand, in smaller batches. It's an art, not a science! This means that the distribution of color can vary from skein to skein. This is part of the charm, but it also means you need to be a little strategic when using it. Think of it like snowflakes – no two are exactly alike. This uniqueness is what gives hand-dyed yarn its depth and character, something you just can't replicate with mass-produced yarns.
Semi-Solid Versus Variegated Colorways
Hand-dyed yarns come in all sorts of colorways, but two of the most common are semi-solid and variegated. Semi-solid yarns are mostly one color, but with subtle variations in tone. They might have lighter and darker shades of the same color throughout the skein. Variegated yarns, on the other hand, have multiple colors that change frequently. Think of a rainbow, or a skein with speckles of different colors. Knowing the difference is important because it affects how the yarn will look when knitted up. For example, self-striping sock yarn can create unexpected patterns in larger projects.
Why Color Variation Occurs in Hand-Dyed Skeins
So, why does this color variation happen? Well, it's all about the dyeing process. Hand-dyers often use techniques like kettle dyeing, where the yarn is immersed in a dye bath and the colors are allowed to blend and shift organically. This creates beautiful, complex colorways, but it also means that the dye doesn't always distribute evenly. Factors like how the yarn is arranged in the kettle, the temperature of the dye bath, and the amount of time the yarn is left in the dye all play a role. It's this element of unpredictability that makes hand-dyed yarn so special, but it also means you need to be aware of potential color variations and plan accordingly.
When working with hand-dyed yarn, it's important to embrace the variations. These variations are not flaws, but rather part of what makes hand-dyed yarn so beautiful and unique. By understanding the characteristics of hand-dyed yarn, you can make informed decisions about how to use it in your projects and create stunning, one-of-a-kind pieces.
Why You Should Alternate Skeins
So, you've got some gorgeous hand-dyed yarn, ready to become something amazing. But hold on! Before you cast on, let's talk about why alternating skeins is often a really good idea. Trust me, it can save you from some serious knitting headaches.
Preventing Visible Join Lines
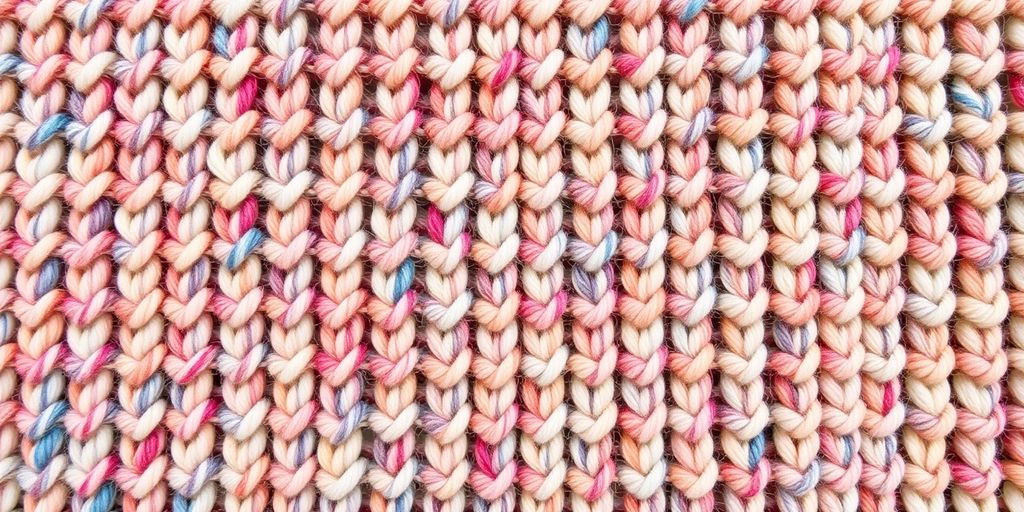
Okay, picture this: you're knitting along, happily using up one skein, and then you join a new one. With commercially dyed yarn, this is usually no big deal. But hand-dyed yarn? Even skeins from the same dye lot can have subtle differences. Without alternating, you might end up with a noticeable line where one skein ends and the next begins. It's like a stripe you didn't ask for! Alternating helps blend those differences for a smoother transition.
Avoiding Unwanted Color Pooling
Color pooling is when the colors in a variegated yarn clump together in certain areas of your project, creating distinct blotches or patterns. It can be a cool effect if you want it, but usually, it's just annoying. Alternating skeins helps distribute the colors more randomly, breaking up those pools and giving you a more even, blended look. If you are using assigned pooling, this is not the technique for you.
Minimizing Color-Blocking Issues
Color-blocking is similar to pooling, but on a larger scale. Instead of small blotches, you get big chunks of color that don't quite flow together. This often happens when there are significant color variations between skeins. Alternating helps to average out those differences, preventing your project from looking like it was made from mismatched pieces. It's all about creating a cohesive, harmonious fabric.
Think of alternating skeins like mixing paint. If you just slapped different colors onto a canvas, you'd get a messy, disjointed look. But if you blend them together, you create a smoother, more unified piece of art. Alternating skeins does the same thing for your knitting or crochet.
When to Alternate Skeins for Best Results
Multi-Skein Projects and Large Items
When tackling a project that demands multiple skeins, like a cozy blanket or a stylish sweater, alternating skeins becomes your best friend. It's especially important to consider this for larger projects. Think of it as insurance against unwanted surprises in your finished piece. If you're using hand-dyed yarn, the subtle differences between skeins can become amplified over a large area, leading to noticeable lines or color blocks. Alternating helps distribute those variations evenly, creating a more cohesive and visually appealing result.
Highly Variegated Yarn Considerations
Variegated yarn, with its vibrant and unpredictable color changes, can sometimes lead to pooling – where the same color clumps together in certain areas. While some knitters embrace pooling as a unique feature, others prefer a more blended look. If you fall into the latter category, alternating skeins is a must. By switching between two skeins every few rows or rounds, you break up the potential for pooling and create a more harmonious distribution of color throughout your project. It's a simple technique that can make a big difference in the final appearance of your finished fabric.
Semi-Solid Yarn Blending Techniques
Even with semi-solid yarns, which appear relatively uniform in color, subtle variations can exist between skeins. These differences might not be immediately obvious, but they can become noticeable when you join a new skein, resulting in a distinct line. To avoid this, consider alternating skeins for a short period – perhaps half an inch or so – as you transition from one skein to the next. This technique, often called "blending" or "fading," creates a gradual and seamless transition, ensuring that your project looks cohesive and professional.
Alternating skeins isn't just about aesthetics; it's about managing the inherent characteristics of hand-dyed yarn. By understanding how color variations can impact your project, you can make informed decisions about when and how to alternate skeins for the best possible results.
Here's a quick guide:
- Large Projects: Always alternate.
- Variegated Yarn: Alternate to avoid pooling.
- Semi-Solid Yarn: Blend skeins at joins.
Methods to Effectively Alternate Skeins
The Carry-Up Method for Alternating Skeins
The carry-up method is a popular way to manage multiple skeins when working in the round or flat. It involves carrying the unused yarn up the side of your work, so it's ready for the next row or round. This is especially useful when you want to avoid cutting the yarn after every color change.
Here's how it generally works:
- At the end of the row/round, instead of cutting the yarn, bring it up the edge.
- On the next row/round, pick up the carried yarn and begin knitting.
- Be mindful of tension to avoid puckering.
The carry-up method can sometimes create a slightly visible line along the edge of your work, especially if your tension isn't consistent. However, it's a great option for projects where you don't want to weave in a ton of ends.
Alternating Every Other Row or Round
This method is pretty straightforward. You work with one skein for two rows or rounds, then switch to the other skein. This helps to blend the colors more gradually. It's a good choice when you want a subtle transition between skeins.
Here's a simple breakdown:
- Knit two rows/rounds with Skein A.
- Drop Skein A and pick up Skein B.
- Knit two rows/rounds with Skein B.
- Repeat steps 1-3.
Managing Tension When You Alternate Skeins
Tension is key when alternating skeins. If you pull too tightly with one skein, it can create a noticeable difference in your fabric. Aim for even tension throughout your project to ensure a smooth, consistent look. Uneven tension can lead to puckering or a visible line where you switch skeins.
Here are some tips for managing tension:
- Relax your grip on the yarn.
- Make sure the yarn flows freely from the skein.
- Periodically check your gauge to ensure consistency.
Blending and Fading Techniques
Gradual Transitions Between Skeins
Sometimes, you don't want a hard line where one skein ends and another begins. That's where blending or fading comes in. Instead of fully alternating skeins, you work a gradual transition. This technique is especially useful with semi-solid yarns where the color differences between skeins might be subtle but still noticeable.
Short-Term Alternating for Seamless Joins
When you're nearing the end of a skein, instead of just tying on the new one, try alternating for a short distance – maybe half an inch or an inch. This mixes the colors from both skeins, creating a more seamless join. It's like a mini version of full skein alternating, but just enough to blur the line between skeins.
When to Blend Versus Full Alternating Skeins
Deciding whether to blend or fully alternate depends on the yarn and the effect you want.
- Blending: Best for semi-solid yarns where you want to avoid a distinct line.
- Full Alternating: Ideal for highly variegated yarns to distribute color variations and prevent pooling.
- Consider the Project: For smaller projects, blending might be sufficient. Larger projects with variegated yarn often benefit from full alternating.
Blending is a subtle art. It's about creating a smooth transition that's almost invisible. Full alternating, on the other hand, is about distributing color evenly throughout the project. Think about the yarn's characteristics and the desired outcome to choose the best approach.
Visualizing the Impact of Alternating Skeins
Examples of Unblended Skein Joins
Okay, so you've got your hand-dyed yarn, and you're ready to knit. But what happens if you don't alternate skeins? Well, sometimes, you end up with a pretty obvious line where one skein ends and another begins. It's like a little stripe of slightly different color. I've totally been there! I was working on a project with a semi-solid yarn, and I didn't bother to blend the skeins. Big mistake. You could totally see the distinct line where I joined a new skein. It wasn't the end of the world, but it definitely wasn't the smooth, consistent look I was going for.
How Alternating Skeins Creates Consistency
Alternating skeins is like a magic trick for hand-dyed yarn. It helps to distribute the color variations more evenly throughout your project. Instead of having blocks of slightly different colors, you get a blended effect. This is especially useful if you're working on a large project, like a sweater or a blanket. The overall effect is a much more cohesive and professional-looking finished piece. It's worth the extra effort, trust me!
Comparing Pooled Versus Alternated Fabrics
Color pooling can be a real pain, especially with highly variegated yarns. It's when a particular color clumps together in one area, creating a noticeable "pool" of color. Alternating skeins can help prevent this by breaking up those pools and distributing the colors more randomly.
Think of it like this: imagine you're mixing paint. If you just dump all the colors in one spot, you'll get a blob. But if you mix them gradually, you'll get a more even, blended color. Alternating skeins does the same thing for your knitting.
Here's a quick comparison:
- Pooled Fabric: Uneven color distribution, distinct color clumps, less consistent appearance.
- Alternated Fabric: More even color distribution, blended colors, more consistent appearance.
- Unblended Fabric: Visible lines, abrupt color changes, less professional look.
Preparing Your Yarn to Alternate Skeins
Winding Multiple Skeins Before Starting
Before you even think about casting on, take the time to wind your yarn. I know, I know, it's tempting to jump right in, but trust me on this one. Winding at least two skeins – or even all of them if you're using more – into cakes or balls will make the alternating process so much smoother. It prevents tangles and allows you to easily grab the next skein without a yarn barf explosion. Plus, you can visually compare the color distribution in each skein, which helps you anticipate any potential pooling or color-blocking issues. This is especially important when working with hand-dyed yarn.
Setting Up Your Project for Alternating Skeins
Think about your project setup before you start knitting or crocheting. Are you working flat or in the round? This will influence how you carry your yarn up the side or inside of your work. Have a designated spot for each skein to prevent them from becoming a tangled mess. I like to use small bowls or yarn bags to keep them separate and contained. Also, consider using stitch markers to indicate which rows or rounds you've alternated, especially if you're easily distracted (like me!).
Integrating New Skeins Smoothly
When you're ready to introduce a new skein, don't just tie a knot and hope for the best! There are a few techniques you can use to create a more seamless join. The Russian join is a great option for a strong, nearly invisible join. Another method is to overlap the ends of the old and new skeins for a few stitches, which creates a gradual transition. Experiment with different techniques to find what works best for your yarn and project.
It's also a good idea to weave in your ends as you go, rather than waiting until the very end. This prevents a huge pile of weaving-in at the finish line, and it also helps to secure your joins and prevent them from unraveling.
Here's a quick guide to help you decide when to weave in ends:
| Project Type | Weave in Ends |
|---|---|
| Scarves | Every skein |
| Sweaters | Every 2-3 skeins |
| Blankets | As needed |
Here are some tips for integrating new skeins:
- Always leave a tail of at least 6 inches for weaving in.
- Avoid joining new skeins at the beginning or end of a row or round.
- Consider using a lighter color to blend the skeins.
- Don't be afraid to frog a section if you're not happy with the join!
Wrapping It Up
So, there you have it. When you're working with hand-dyed yarn, especially for bigger projects, alternating skeins is usually a good idea. It helps keep things looking smooth, avoiding those weird lines or blotches that can pop up. Whether you go for a full-on alternating method or just blend a little when you switch skeins, it's all about getting a result you'll be happy with. Ultimately, it's your project, so do what feels right for you and your yarn. Happy crafting!
Frequently Asked Questions
What is hand-dyed yarn?
Hand-dyed yarn gets its color from people dyeing it by hand, not machines. This means each skein is a little bit different, even if it's the same color. It's like how no two handmade cookies are exactly alike.
What does 'alternating skeins' mean?
Alternating skeins means you knit or crochet with two different balls of yarn at the same time, switching between them every row or two. This helps blend the colors and makes your project look more even.
Why is it important to alternate skeins?
You should alternate skeins to avoid two main problems: 'pooling' (where colors clump together in weird spots) and 'color-blocking' (where you see clear lines where one ball of yarn ended and another began). It helps make your finished item look smooth and professional.
When should I alternate skeins?
If your project uses more than one ball of hand-dyed yarn, especially for big things like sweaters or blankets, it's a good idea to alternate. This is super important for yarns with lots of different colors in one skein (variegated yarns).
How do I alternate skeins?
There are a few ways! One common way is the 'carry-up' method, where you bring the unused yarn up the side of your work. You can also just switch yarns every other row or round. The key is to keep your yarn not too tight when you switch.
Do I always have to alternate skeins?
Not always! If you're using just one skein, or if the yarn is a solid color with very little change, you probably don't need to. Some people also like the look of pooling or color-blocking, so it's really up to what you prefer for your project.