

So, you want to knit a scarf, a sweater, or some socks. And now you are wondering what’s the best wool for that kind of project? How do you choose yarn for project without regrets? Well, then you came to the right place because in this tutorial I will show the art of yarn picking and substitution step-by-step. I keep on telling my students that finding the right kind of yarn is 80 percent of job. The best pattern can look awful with the most expensive yarn ever and the simplest scarf in garter stitch can still look stunning if you choose the right yarn. That’s why I prepared a little questionnaire for you with 5 important yarn properties you need to be aware of before you click on “buy now”.
Key Takeaways
- Always consider the yarn's fiber type first, as it sets the stage for your project's feel and use.
- Yarn weight impacts how fast your project finishes and how warm it will be.
- The way yarn is twisted, or "plied," affects how your stitches look.
- Learning basic color theory helps you pick yarn colors that look good together.
- Always knit a small test swatch to check how your chosen yarn and needle size work together.
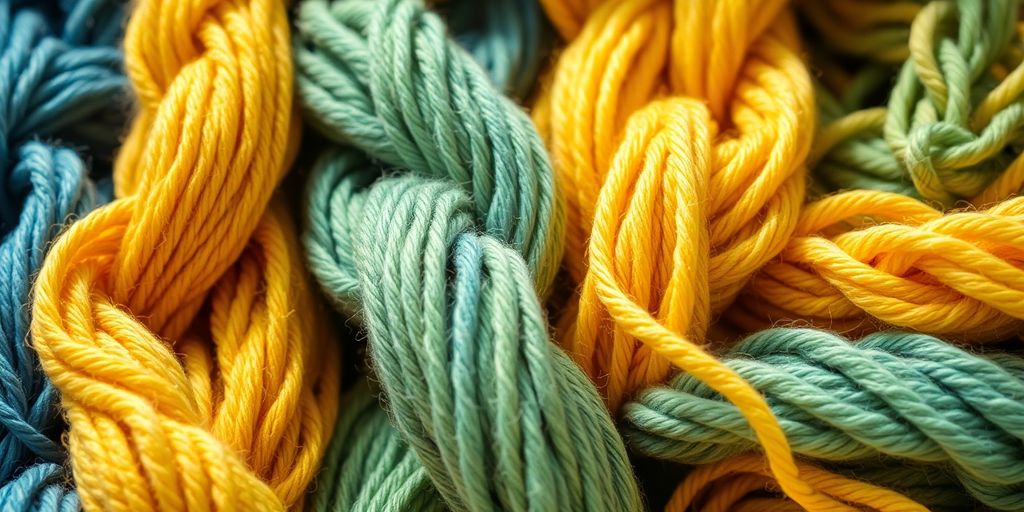
Understanding Yarn Fiber Types
Selecting the Right Material for Your Project
Choosing the right yarn starts with understanding fiber types. It's easy to get caught up in color, but the fiber content dictates a lot about the final product. The fiber impacts drape, warmth, durability, and even how easy the yarn is to work with. Think about what you're making. A baby blanket needs to be soft and washable, while a sturdy bag requires something strong and less prone to stretching. Don't just grab the prettiest color; consider the fiber first!
Common Fiber Choices for Beginners
For those just starting out, some fibers are more forgiving than others. Here's a quick rundown:
- Wool: A classic choice. It's warm, has good stitch definition, and is relatively easy to work with. Plus, it's got some natural give, which can be helpful when you're still learning to maintain even tension. There are many different yarn types to choose from.
- Acrylic: Budget-friendly and machine washable, acrylic is great for practicing new stitches or making items that will see a lot of wear and tear. It doesn't have the same warmth or drape as wool, but it's a solid option.
- Cotton: Breathable and easy to care for, cotton is ideal for summer projects like dishcloths or lightweight tops. It doesn't stretch much, so it's good for projects where you want to maintain shape.
Considering Ethical and Sustainable Options
More and more knitters and crocheters are thinking about the environmental impact of their craft. Luckily, there are some great sustainable yarn options out there.
Consider things like organic cotton, which is grown without harmful pesticides, or recycled yarns made from materials like plastic bottles or fabric scraps. Also, look into locally sourced wool from farms that practice ethical animal treatment. It might cost a bit more, but it's an investment in a better future. You can even check out needle sizes to match your yarn.
Here's a quick comparison of some eco-friendly options:
| Fiber | Sustainability Notes |
|---|---|
| Organic Cotton | Grown without pesticides; uses less water than conventional cotton. |
| Recycled Yarn | Made from recycled materials, reducing waste. |
| Bamboo | Fast-growing and requires less water than cotton, but processing can be chemical-intensive. |
Choosing the Ideal Yarn Weight
Okay, so you've got your fiber sorted out, now it's time to think about yarn weight. This is where things get interesting because the weight of your yarn will seriously impact your project. It's not just about how much yarn you need, but also about the look and feel of the finished piece. Let's break it down.
Impact of Yarn Thickness on Project Speed
The heavier the yarn, the faster your project will grow. Think about it: bigger stitches mean you cover more ground with each pass. If you're looking for a quick win, like a last-minute gift, reaching for a bulky or super bulky yarn is a smart move. On the other hand, if you enjoy the process and want something more intricate, a lighter weight yarn will keep you busy for longer. It really depends on your goals and how much time you have.
Matching Weight to Intended Use and Warmth
Yarn weight plays a big role in how warm your finished project will be. A chunky yarn creates a denser fabric, trapping more air and providing more insulation. This is perfect for winter hats, scarves, and cozy blankets. Lighter weight yarns, like fingering or lace weight yarn, are better suited for warmer weather garments or items where breathability is key. Consider the climate and the intended use of your project when choosing your yarn weight.
Achieving Desired Drape and Delicacy
Want a flowy, elegant shawl? Or maybe a delicate lace scarf? Then you'll want to reach for a lighter weight yarn. Thinner yarns create fabrics with more drape, meaning they hang and move beautifully. Heavier yarns, on the other hand, tend to create stiffer fabrics with more structure. The choice is yours, but keep in mind that the yarn weight will significantly impact the final drape and stitch definition of your project.
It's worth noting that yarn weight isn't an exact science. Different brands may have slightly different interpretations of what constitutes a "worsted weight" or a "DK weight." Always check the recommended gauge on the yarn label and swatch before starting your project to ensure you're getting the desired results.
Here's a general guide to yarn weights:
| Weight Category | Weight Name | Recommended Needle Size (US) | Gauge (stitches per inch) |
|---|---|---|---|
| 0 | Lace | 0-1 | 8-12 |
| 1 | Super Fine (Fingering) | 1-3 | 7-9 |
| 2 | Fine (Sport) | 3-5 | 6-8 |
| 3 | Light (DK) | 5-7 | 5.5-6.5 |
| 4 | Medium (Worsted) | 7-9 | 4.5-5.5 |
| 5 | Bulky | 9-11 | 3-4 |
| 6 | Super Bulky | 11+ | Less than 3 |
Remember, these are just guidelines. Always swatch to confirm!
Navigating Yarn Ply and Behavior
How Ply Influences Stitch Definition
When you're picking out yarn, it's easy to focus on color and feel, but don't forget about ply! Ply refers to the number of strands that are twisted together to make the yarn. This seemingly small detail can have a big impact on how your stitches look in the finished project.
- Single-ply yarns can create a soft, slightly fuzzy fabric, but they might also be prone to pilling or splitting.
- Multi-ply yarns (like 2-ply, 3-ply, or 4-ply) tend to be more durable and offer better stitch definition.
- The twist of the ply also matters; a tighter twist will result in a firmer, more defined stitch, while a looser twist will create a softer, more relaxed fabric.
Think of it like this: a yarn with good stitch definition will make intricate patterns like cables or lace stand out beautifully. A yarn with poor stitch definition might make those same patterns look muddy or indistinct. So, consider your project and choose a ply that will showcase your stitches in the best possible light.
Testing Yarn Behavior with Swatches
Okay, you've got your yarn, you're ready to cast on... but wait! Before you jump into your project, take the time to knit a swatch. I know, I know, swatching can feel like a chore, but it's seriously worth it. A swatch lets you see how the yarn will actually behave when knitted up. Will it drape nicely? Will it hold its shape? Will it grow or shrink when washed? These are all important things to know before you invest hours into a project.
Here's a simple way to test your yarn:
- Cast on enough stitches to create a square swatch (usually around 4-6 inches).
- Knit in your chosen stitch pattern for several rows.
- Bind off loosely and block the swatch as you would the finished project.
After blocking, measure the swatch to check your gauge. Also, pay attention to how the fabric feels and looks. Does it have the drape you want? Does the stitch pattern look clear and defined? If not, you might need to try a different yarn or needle size. This is also a good time to check out Kim's controlled release technique for plyback samples.
Understanding S-Spin and Z-Spin Yarns
You might have heard the terms
Mastering Yarn Color Combinations
Applying Basic Color Theory
Color theory can seem intimidating, but it's actually pretty useful for knitting. Understanding basic color relationships can really elevate your projects. You don't need to be an artist to grasp the fundamentals. Think about the color wheel – colors opposite each other (complementary colors) create contrast, while colors next to each other (analogous colors) create harmony.
- Complementary colors: Red and green, blue and orange, yellow and purple.
- Analogous colors: Blue, blue-green, and green.
- Triadic colors: Red, yellow, and blue.
Color theory isn't about strict rules, it's about understanding how colors interact. Experiment and see what you like! Don't be afraid to break the "rules" if it feels right for your project.
Creating Harmonious Palettes
Creating a harmonious palette is all about balance. You want colors that work well together without being too overwhelming. One way to achieve this is by using different shades and tints of the same color. For example, you could combine a dark navy blue with a light sky blue and a medium denim blue. Another approach is to use a limited color palette, focusing on just a few colors that complement each other. If you are looking for the most expensive yarn ever, you might want to consider the color palette.
- Use different shades and tints of the same color.
- Limit your color palette to a few complementary colors.
- Incorporate neutral colors like gray, beige, or white to balance brighter hues.
Using the 60-30-10 Rule for Visual Balance
The 60-30-10 rule is a simple guideline for creating visually balanced color schemes. It suggests using one color for 60% of your project, a second color for 30%, and a third color for 10%. The 60% color is usually a neutral or background color, the 30% color is a complementary color, and the 10% color is an accent color. This rule helps to create a sense of visual hierarchy and prevents your project from feeling too chaotic. It's a great way to choose yarn for knitting without regrets.
| Percentage | Color Role | Example |
|---|---|---|
| 60% | Dominant/Neutral | Light Gray |
| 30% | Secondary/Accent | Teal |
| 10% | Accent/Highlight | Mustard Yellow |
This rule is just a starting point, feel free to adjust the percentages to suit your personal preferences and the specific needs of your project. For example, if you're knitting a striped scarf, you might want to use two colors in a 50/50 split. The key is to experiment and find what works best for you.
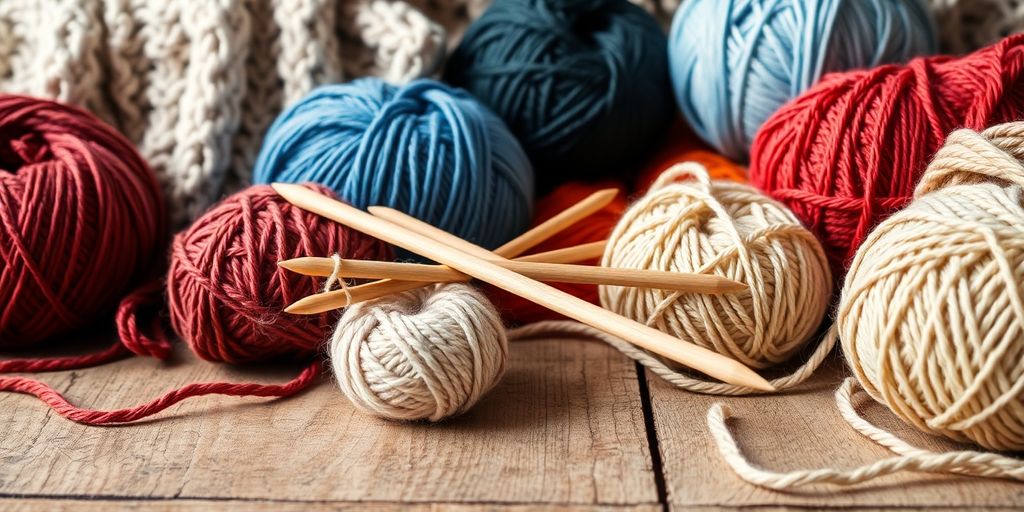
Determining the Correct Needle Size
The Importance of Swatching for Gauge
Okay, so you've picked out your yarn, you're excited to start your project, but hold on! Before you cast on all those stitches, there's one super important step: swatching. Swatching is basically knitting a small sample of your project to see how the yarn behaves with the needles you've chosen. It might seem like a waste of time, but trust me, it can save you from a lot of frustration down the road.
Think of it this way: every knitter has a unique tension. Some knit loosely, others knit tightly. This tension affects the size of your stitches, and that's where gauge comes in. Gauge is the number of stitches and rows per inch (or centimeter) that you get with a particular yarn and needle combination. If your gauge doesn't match the pattern's gauge, your finished project won't be the right size. Swatching lets you check your gauge and adjust your needle size if needed. It's like a test run before the main event!
Adjusting for Yarn Substitution
Let's say your pattern calls for a specific yarn that you can't find or don't want to use. No problem! You can totally substitute yarn, but you need to be extra careful about your needle size. Even if you choose a yarn with the same weight as the original, it might behave differently. Different fibers have different characteristics, and that can affect your gauge. For example, a worsted-weight yarn made of wool might knit up differently than a worsted-weight yarn made of cotton.
When substituting yarn, always swatch with the new yarn and the needle size recommended for the original yarn. Then, compare your gauge to the pattern's gauge. If you have more stitches per inch than the pattern, go up a needle size. If you have fewer stitches per inch, go down a needle size. Keep swatching until you get the right gauge. It's a bit of trial and error, but it's worth it!
Ensuring Project Success with Accurate Sizing
Getting the right needle size is key to making sure your project turns out the way you want it to. If your gauge is off, your sweater might be too big or too small, your hat might be too tight, or your scarf might be too short. Nobody wants that! Accurate sizing is especially important for fitted garments like sweaters and cardigans. A small difference in gauge can make a big difference in the final fit. So, take the time to swatch, adjust your needle size, and get your gauge right. Your finished project will thank you for it. Here's a quick guide to help you:
- Too many stitches/rows per inch: Use larger needles.
- Too few stitches/rows per inch: Use smaller needles.
- Match gauge: You're good to go!
| Yarn Weight | US Needle Size (Approx.) | Metric Needle Size (Approx.) |
|---|---|---|
| Lace | 0 - 1 | 2.0 - 2.25 mm |
| Fingering | 1 - 3 | 2.25 - 3.25 mm |
| Sport | 3 - 5 | 3.25 - 3.75 mm |
| DK | 5 - 7 | 3.75 - 4.5 mm |
| Worsted | 7 - 9 | 4.5 - 5.5 mm |
| Bulky | 9 - 11 | 5.5 - 8.0 mm |
| Super Bulky | 11+ | 8.0 mm+ |
Remember, these are just guidelines. Always check the yarn label and swatch to confirm. Happy knitting!
Essential Yarn Label Information
Understanding Yarn Yardage and Price
Okay, so you're standing in the yarn aisle, overwhelmed by choices. One of the first things to consider is the yarn yardage. Yarn labels always tell you how much yarn is on the skein, ball, or hank. Don't just look at the price tag; compare the yardage. A cheaper skein might have significantly less yarn than a slightly pricier one. This is especially important for larger projects. You don't want to run out halfway through and discover the store is out of that dye lot! Here's a quick example:
| Yarn Brand | Price | Yardage |
|---|---|---|
| A | $8 | 200 yards |
| B | $10 | 250 yards |
Brand B is a better deal, even though it costs more upfront, because you get more yarn for your money. Always do the math!
Matching Dye Lots for Consistent Color
If your project needs more than one skein of the same color, pay close attention to the dye lot. Dye lots are numbers assigned to batches of yarn dyed at the same time. Even if the color name is the same, slight variations can occur between dye lots. Imagine knitting a sweater and ending up with slightly different shades on the sleeves – not ideal!
- Always buy enough yarn from the same dye lot to complete your project.
- Check the dye lot number on each skein before purchasing.
- If you can't find matching dye lots, consider alternating skeins every few rows to blend any subtle differences.
It's happened to all of us: you think you have enough yarn, only to realize you're short a skein. You rush back to the store, grab what you think is the same color, and start knitting, only to discover later that it's slightly off. Save yourself the headache and double-check those dye lots!
Interpreting Washing and Care Instructions
The yarn label is your best friend when it comes to caring for your finished project. The label will tell you whether the yarn is machine washable, hand wash only, or requires special treatment. Ignoring these instructions can lead to disaster – think shrunken sweaters or felted scarves. Different fibers need different care. For example, superwash wool organic yarn is treated to prevent felting and can usually be machine washed, while untreated wool often requires hand washing. Always check the label before tossing your creation in the washing machine. Here are some common symbols you might see:
- Machine wash (with temperature guidelines)
- Hand wash
- Do not wash
- Tumble dry (with temperature guidelines)
- Lay flat to dry
- Iron (with temperature guidelines)
Understanding these symbols will help you keep your projects looking their best for years to come. If you are crocheting a large project, you'll want to make sure you can properly care for it!
Additional Considerations for Yarn Selection
Opting for Smooth Yarn Textures
When you're starting out, or even when you're tackling a complex project, the texture of your yarn can make a big difference. Smooth yarns are generally easier to work with, especially if you're still getting the hang of things. Novelty yarns, like eyelash yarns or anything with a lot of texture, can hide your stitches and make it harder to see what you're doing. This can lead to mistakes and frustration, which is the last thing you want!
Choosing Light Colors for Visibility
Dark yarns can be beautiful, but they can also be a real pain to work with, especially in low light. It's much easier to see your stitches when you're using a light-colored yarn. This is especially true for intricate stitch patterns or when you're trying to troubleshoot a mistake. Trust me, your eyes will thank you. I've definitely learned this the hard way, squinting at black yarn under a dim lamp!
Balancing Price and Project Investment
Yarn prices can vary wildly, depending on the fiber content, brand, and where you buy it. It's tempting to splurge on the most luxurious yarn you can find, but it's important to consider your budget and the scope of your project. For smaller projects, like hats or scarves, you might be able to justify spending a bit more. But for larger projects, like blankets or sweaters, the cost can really add up.
It's often a good idea to start with more affordable yarns, especially when you're learning a new technique or trying out a new pattern. This way, if you make mistakes or decide you don't like the project, you won't feel like you've wasted a ton of money. Plus, there are plenty of great affordable yarns out there that are still a joy to work with.
Wrapping It Up
So, there you have it. Picking out yarn might seem like a big deal at first, with all the different kinds and what not. But really, it's about knowing a few basic things and then just trying stuff out. Don't stress too much about getting it perfect right away. The more you make things, the better you'll get at figuring out what yarn works best for what. Just have fun with it, and don't be afraid to experiment a little. Happy crafting!
Frequently Asked Questions
What kind of yarn is best for someone just starting out?
The best yarn for beginners is usually something smooth and light-colored. Avoid fuzzy or dark yarns because they make it hard to see your stitches. Cotton, wool, and acrylic are often good choices because they're easy to work with and generally affordable.
Why should I bother reading the yarn label?
Yarn labels are super important! They tell you how much yarn is in the ball (yardage), if all your balls of yarn will match in color (dye lot), and how to wash your finished project. This info helps you buy enough yarn and take care of your creation properly.
What does 'yarn weight' mean, and why does it matter?
Yarn weight refers to how thick the yarn is. Thicker yarns make projects go faster and feel warmer. Thinner yarns create a softer, more flowy fabric. The right weight depends on what you're making and how you want it to look and feel.
What is yarn ply, and how does it affect my project?
Ply is about how many strands are twisted together to make the yarn. It affects how your stitches look. Some yarns might twist or roll, which is important for certain patterns like lace. Sometimes you just have to knit a small piece (a swatch) to see how the yarn behaves.
How can I pick colors that look good together for my yarn project?
Choosing colors can be fun! A good trick is the 60-30-10 rule: 60% of your project is a main color, 30% is a secondary color, and 10% is a small accent color. Thinking about colors that look good together, like those found in nature, can also help you make pretty combinations.
Why is it important to make a 'swatch' before starting a big project?
Making a small test piece, called a swatch, is key! It helps you see if your yarn and needles make the fabric the right size and density for your pattern. Even if you switch to a different brand of yarn, knitting a swatch helps you figure out if you need to use different size needles to get the right fit.